Using Custom Grid Views
In addition to changing the Default View of a grid, you can also create custom ‘data views’ to suit specific purposes. For example, you could define a view in Employee | Leave History which only displays instances of Personal Leave taken by an employee. You might also choose to display these leave items sorted by ascending number of hours. Once you have spent time setting up a customised grid view, you may want to save it for re-use at any time. These views can also be printed, exported, and deleted.
The next steps look at saving the grids that you have created and generated.
- Search for an employee (e.g. Hilary Hackman) and view their Leave History.
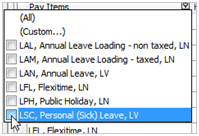
- In the Pay Items field, filter to display Personal Leave. For example:
- Click the HrsUnits column heading to sort the field into ascending order.
- To save this grid view for future use, click the View Options button, then select Save Current View:
- In the Save View Whereto dialog box that opens, choose one of the options. You can:
- Save the view as a new view and give it an appropriate name
- Replace an existing view using the ‘Over existing view’ option, and by choosing the view you want to replace from the drop-down list
- Save it as an external file by browsing to the required destination.
- For the purpose of this exercise, save this as a new view and give it the name ‘Personal Leave Only’.
- Click OK.
- Once you have saved a view it will be available in the drop-down Views list in the toolbar:


You should see that the grid now only contains occurrences of Personal Leave taken by this employee.
You will also see the details of this filter shown in the panel at the bottom of this grid:


The Enhanced Grids have a comprehensive printing function that allows you to specify the destination printer, the page layout, margins, header or footer details or page scaling of the view which is used to define the page set-up/layout for printed copies. These options are all available via the Print drop-down button.
As some of the query reports you define may be physically wider than one page, the options within the Page Setup selection allow you to specify the ‘Z Order’ of the printed report; either ‘Down, then over’ or ‘Over, then down’. An alternative is to use the Page Scaling (e.g. Fit to page) option. You should experiment with these settings to see which one gives you the results you require.
The Enhanced Grids allow you to export their data to a file in the formats Excel, Text, HTML, XML, or CSV. When exporting, it copies data from the query into a new file which can be used in another application.
- Generate the query and format the data as required.
- Click the Export button

- Select the desired export type from the drop-down list.
- Specify the name and destination for the exported file.
- Click Save.
Once you have created a customised view, the Delete button  will be activated within View Options.
To delete a customized view:
- Select the view you want to delete.
- Click the View Options button

- Select the Delete option:

- You will be asked if you want to delete the selected view. If you are sure you want to delete that view, click Yes.
Note: You are not able to delete the Default View. Only views that you have created can be deleted from the system.
